Welcome back to Let's Play Tales of Maj'Eyal.
Last time, we cleared Trollmire 1, and I explained more about the game. This time, we'll be doing Trollmire 2.
You know, I coulda sworn I took a screenshot at the entrance of Trollmire 2, instead my first screenshot is here, where I channel staffed to death a Forest Troll. At a guess, I took it because of the 'you collect a new ingredient' message. Ingredients are... not very important. But more importantly, we outright don't care until we've picked up a certain sidequest.
Our first large white snake. Mostly, they aren't interesting. They are weak melee that can poison you and move
somewhat fast. They also 'move erratically', I believe, but there is no character I have ever had be at all concerned by them unless desperately low on health for unrelated reasons.
Our first giant brown mouse. They have stealth, which can lead to you not knowing where they are (erratically, based on your stealth detection which... can be boosted by gear, certain talents, and as I recall the Cunning stat, but is largely unimportant), but they are pathetically weak even for the early game, and stealth breaks if they attack.
Our first white worm mass.
Let's inspect them, by right clicking on them and bringing up this drop down menu. We could also use it to use Channel Staff, Throw Bomb, or Attack, in this case, or to tell our character to move to the tile. I believe if we did that they'd automatically stop because of there being an enemy in sight.
White worm masses are fragile, and slightly slow, global speed wise. Which makes them slow at everything. This is what we initially see when inspecting, the creatures 'general' stats.
Here's why I bothered to screenshot all this- by clicking into 'talents' (or pressing T as a hotkey) we can see it's Talents. Multiply is a significant talent, usually found on very weak enemies. You see, multiply makes a copy of the user. The copy
also knows multiply, of course. In the rare cases of stronger enemies with it, this can get out of control. Fortunately, for the most
common possible way to see a strong enemy with multiply, it won't actually make a proper copy. More on that later.
Oh, they also have poisonous crawl. This is just an extra strong melee attack that poisons. Largely forgettable given how weak white worm masses are.
And way off in the distance, ten tiles out, we see our first giant brown ant. With the thrilling description that 'It's a large brown ant'. They are basically forgettable enemies.
Eventually, the battle is finished with nothing truly interesting happening, save for us leveling. Which we did. Let's look at that. The astute reader may notice our golem has also hit level 2.
I mouse over that up arrow below 'lvl 2' and as the game tells me I click, to be able to assign stats and talents.
Bringing us to a somewhat familiar screen. First things first, I want extract gems 2.
Then I look at class point spending. I could take Golem Power to level 2... (I also dumped all my stat points into magic. Magic is THE alchemist stat, keep it high.) This would improve our Golems accuracy and damage in melee.
Instead I want to raise Throw Bomb to level 2, though. A nearly 25% increase in the damage of our bread and butter talent
and more range (that we can throw the bomb), so we can kill things from farther? Much more important.
Terrabrand the golem killed a wolf. My only guess as to why I originally took this screenshot is 'This might be when I noticed my Golem had also leveled.'
I haven't played Alchemists much and the Golem has no parallel on other classes. Easy mistake to make.
So we interact with the golem, 'to change his talents.
Bringing us to his talent screen. Unlike us, he did not pick up a class point and got only two stat points. He also didn't gain a generic point but at the same time he has no generic trees. Alchemist golems don't ever naturally gain generic points. And they only gain one class point each three levels.
We could, potentially, at level three level up Knockback. We won't, because...
Eye Beam exists. Eye Beam is insanely good early on. It hits harder than our alchemist bombs and cools down faster. It's also a 'beam', which means it hits everything in its path. (that can include us. Careful about standing between your Golem and the enemy.) It's well worth taking asap.
But for the moment we pump our golem's strength. Because that will let it hit harder and, potentially, equip better gear.
Oh, a bee swarm. We inspect...
And see it's fairly pathetic.
Except that it has 200% Global Speed. Don't expect to escape, and its offense is effectively significantly higher, particularly given the 125% attack speed. But while they can inflict poison, they aren't that dangerous directly.
Here's the mouse-over tooltip for attack speed, incidentally.
Anyways. We easily dispatch the bee swarm and find our first belt. Unfortunately, this is a generic belt, which does nothing except have weight. It's sell/transmute fodder, basically.
Our first shield, an iron shield. It is at this point I actually remembered I should
use extract gems.
So we use extract gems.
Which gets us this screen. I extracted from the iron mail armor and iron shield and appear to have failed to get screenshots. Extracting from multiple items requires a separate use for each item.
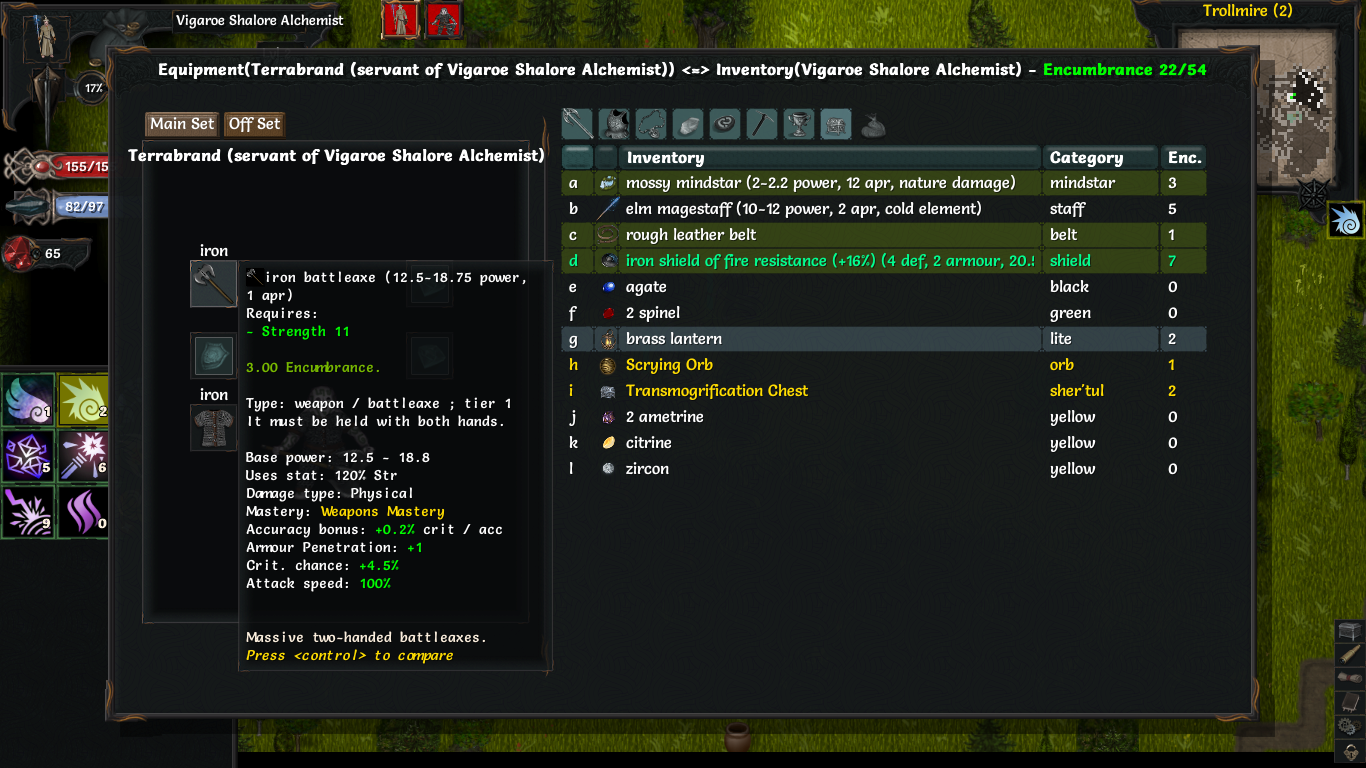
This screen is a subtle variation on the before- it's what we get when we say we want to change the Golem's equipment. In any event, here's that shield we found earlier. The golem can wield it, and it'll get both armor and defense, and a decent chunk of fire resist...
Except it has this two handed battle axe equipped. We'll give it the shield when we have a one handed weapon for it. Also on this screenshot and the preceding, we can see we have one agate, 2 spinel, 2 ametrine, a citrine, and a zircon. These make up the Tier 1 Gems.
Most gear comes in five material tiers (a few slots only come in three tiers). In general, higher tiers are usually flatly better, but also there's some things that directly scale with material level. We can make Alchemist Gems out of these generic gems, and higher tier gems will make for more effective Alchemist Gem Bombs, among other things.
This is also why we want extract gems to fifth level- each talent level covers a new material tier of metal weapons. Not only would we be forced to transmute or lug around Steel gear we inevitably find- not likely
this early, but sooner or later- if we did not already have level 2 extract gems, but gems we extract
from Steel will be tier 2 gems instead of tier 1, which fill the role of being bigger and better versions of the same set, for various purposes.
There's that rough leather belt. Like I said, it does nothing, yet still weighs 1 encumbrance. (Encumbrance is the unit of weight. We currently carry 22 out of a max of 54- there are several ways to raise our encumbrance limit, mostly gear aside from the simple expedient of raising the strength stat.)
Here's the description of the Transmogrification Chest. As we will learn sooner or later, the Sher'Tul are the Mysterious Ancient Super People of the world, no one has seen them in living memory but the stuff they left behind is beyond the stuff modern people can accomplish. No one knows what actually happened to them,
spooky. But yeah. Like I said before, we start with it because I've done something that makes all my games start with it, an actual new player wouldn't have it quite so early.
Ah, here we go. Last time I auto explored into the thing. That scroll sort of thing is a lore item, over by our golem. Lore items have no Encumbrance, but they also don't actually show up in our inventory. We can, however, check our known lore at any time.
At this point, a fight finally ground me low enough on mana to want more. So we use one of our runes, a Manasurge Rune. As the description says, it instantly restores mana- 31, in this case, and causes our mana regeneration to hyper accelerate for a few turns. It also makes it so when 'resting' we gain .5 more mana a turn- which isn't technically what it says, the description read literally says our mana would regenerate at 0.5 per turn, which could potentially be a reduction...
That effect is passive for having the rune inscribed, rather than actually needing to use it. So that's nice.
And here, in the upper right, is our 'surging mana' buff. It might be hard to make out, it's the purple thing in the green edged black background box with a '10' over it, that being the number of turns it will yet last.
Here's that lore item. You can also see our rune will last another 8 turns from this screenshot.
And some fellow sounds rather desperate. Poor fellow.
A mace, one handed. Time...
To change our Golem's equipment.
This time I did think to get the screenshot.
First we give him this new armor we found somewhere on the level. It's exactly the same as his old, except it additionally gives cold resistance.
Even aside from the fact that we can now gem bomb on top of him slightly less harmfully, which isn't really why we care, it means when we run into enemies with cold damage he'll be that bit tougher, and there's no cost compared to his current. So on it goes.
And we switch him to the new mace and give him the shield. Defenses of any sort on our meatshield are a good thing.
This automatically pops up when we try to leave a floor with items in our transmogrification chest.
This particular item is a mossy mindstar, the first tier of mindstars. We basically don't care because they are, effectively, the staff type weapons for Mindpower based classes, in the sense that they are weapons with a primary purpose of supporting 'spells', by which we mean psionic abilities etc. We receive basically no benefit from Mindpower and Mental crit chance, so it'd have to be fantastically beneficial in terms of item egos or the like for us to care. It's not, so we don't. We likely never will care about any mindstars.
That's it for Trollmire 2. Join me next time when we tackle the third floor of the Trollmire.


Comments
Post a Comment