Chimera Squad Enemy Analysis: Progeny Leader Violet

HP: 12/14/14/14
Armor: 1Aim: 80/80/85/85 (+2/+5)
Mobility: 10
Damage: 3-4 (+1/+2)
Will: 150
Initiative: 120
Psi: 100 (Not that she uses her high Psi Offense)
Compared to a regular Sorcerer, Violet has 50~% more HP, a point of Armor, and superior Initiative... and that's actually it before getting into her fight gimmick. Her damage is the same, her Will is the same, her Aim is the same, so on and so forth.
That said, the combination of her boosted durability and monstrous Initiative means she's far more prone to getting turns at all than regular Sorcerers, and it is in fact pretty difficult to prevent her from getting a minimum of two turns, so she's still noticeably more threatening in practice, even before getting into her fight gimmick.
Alert Actions: N/A.
As far as I'm aware Violet never does anything in the Breach Phase. This is an oddity that's standard to boss enemies; no boss enemy get a proper Breach Phase action. I'm not entirely sure why this is so. For about half the bosses it's because they don't start the Encounter around in the first place, but for Violet -among others- there's no obvious reason of that sort to point to. Did the devs think it would 'feel unfair' for bosses to get a free hit in, or something?
Conversely, note that you cannot target Violet in the Breach Phase, period. This is actually a recurring feature of bosses in Chimera Squad; if they're present for the Breach Phase, your squad can't target them, even if you can clearly see your squad has a clean line of fire to them. So at least their weird non-participation is total, not unidirectional.
 Mental Fortress
Passive: Immune to all mental effects.
As Sorcerers have this quality it's no surprise that Violet has it as well, but this is actually standard for the leaders of your Investigation targets; I assume they didn't want the player able to Puppeteer these characters, which makes sense both from the gameplay perspective of 'boss fight conceits tend to break if the player gets to take over the boss' and from the more narrative perspective that taking over a faction leader seems like it ought to offer options that no, the devs aren't going to represent. (ie the devs aren't going to let you terminate Violet's mission by mind controlling her into ordering her troops to stand down, or anything like that)
Of course, since it is standard on Sorcerers and Violet is chiefly a somewhat upstatted Sorcerer, this means Violet having these immunities isn't some big change in how you fight her relative to her standard counterparts.
One minor deviation is that I'm reasonably confident that Violet -and all faction leaders- are immune to Panic, which regular Sorcerers actually aren't immune to. As Panic is barely available to the player and is never fully reliable anyway, this shouldn't be terribly important, but still worth mentioning.
AI Pistol
Passive: Primary weapon is buggy and has an inconsistent response to ammo drain effects.
Violet is, in my experience, much less prone to firing her pistol than Sorcerers are, so this should be less reliably relevant than with Sorcerers, but I'm still noting this on all relevant enemies.
 Tyranny
Turn-ending action: Target ally's turn is moved to immediately after the user's. 3 turn cooldown, 2 turn global cooldown.
Violet has this, but I'm not sure she's willing to use it. I've personally never seen her use it, but that could just be a moderately long streak of improbable RNG or the like. I certainly hope she's not willing to use Tyranny, honestly; just like regular Sorcerers it's generally the case that Violet taking her own turn is the most dangerous thing she can do, and it's always a little jarring if a boss is willing to give up its turn for lesser enemies if the given boss isn't clearly designed around such.
It could be worse, mind; Violet's offenses aren't actually any greater than a regular Sorcerer's. If she had superior damage, her passing off her turn to someone else would be even more likely to be a waste than with regular Sorcerers.
 Null Lance
Turn-ending action: Violet attacks all units in a line, even piercing through solid walls, for 4-5 (+1/+2) damage, potentially damaging or destroying environmental objects in the path. 3 turn cooldown.
As with regular Sorcerers, Null Lance is the primary threat Violet presents. My experience is that she's more reliable about using it than regular Sorcerers, but I'm unwilling to assume my relatively small sample size is truly representative.
That said, essentially everything I said about Sorcerers applies here. The main point of distinction is that Violet is (mostly) very unrealistic to take down before she's taken a turn, and honestly she'll probably get two or even three turns; you should normally plan around the idea that Violet is going to hit at least one person with Null Lance, because it's basically guaranteed to happen.
On the plus side, the maps you can fight Violet on have reasonably spread-out initial agent positions; you're unlikely to have her catch multiple people with one Null Lance, or at least if it does happen it's liable to be due to you clumping agents thoughtlessly rather than because the game did it to you.
 Writhe
1 action point: Violet attacks an adjacent enemy for 3-4 (+1/+2) damage, and heals herself for up to 4 HP. Cannot be used unless Violet is injured. 2 turn cooldown.
I have literally only seen Violet use Writhe by virtue of actively trying to provoke her into using it. This took noticeably fewer trials than with regular Sorcerers -she used Writhe the second time I set it up to be possible for her to do so- so it's possible she prioritizes it more than Sorcerers and just still doesn't try to make it happen herself, but it's also possible that was just chance.
Violet having Writhe is thus much like regular Sorcerers having Writhe; a fact that is technically true, but which is largely irrelevant and probably most players have no idea any enemies have it at all. It mildly discourages trying to stand in melee with Violet, but even more so than with regular Sorcerers this is a technicality because...
 Sorcerer Teleport
1 action point: Violet moves to an arbitrary location without crossing the intervening terrain, bypassing all forms of Overwatch. Additionally, Violet reactively teleports anytime she takes damage, automatically placing herself in relevant Cover when she does so.
If you skipped over the description: Violet picks up a reactive teleport, as compared to regular Sorcerers. So even if you do melee Violet, she's just going to instantly bounce away; her having Writhe can't even meaningfully punish melee! Writhe does make Lockdown more dubious in this fight, in the sense that you probably shouldn't have Zephyr Momentum up next to Violet after hitting a different enemy on the idea she'll hit Violet with Lockdown because that might provoke a Writhe instead, but that barely matters because if she teleports away Lockdown won't trigger anyway; the fact that trying to Lockdown her might be punished instead of ignored is pretty whatever.
Anyway, Violet picking up a reactive teleport is a big part of why Violet tends to get multiple turns; it's extremely difficult to actually arrange to pile a bunch of damage on Violet in a row, because she'll very possibly bounce to somewhere that's not in reach, and even if she's in reach she'll be in Cover so your odds of missing will be noticeably higher. Notably, two of the maps you can fight her on are fairly large and offer opportunities to completely break line of sight/line of fire, giving her pretty good odds of jumping somewhere you really can't hit at all just yet. This is all so much so I honestly tend to just ignore Violet in the first couple of Rounds, in part due to a gimmick of the entire mission:

Resonance Pylons.
Resonance Pylons show up in every Encounter of the Take Down the Progeny mission, and are unique to this mission; they will never show up anywhere else. The graphic itself can show up in other missions (Even aside that it's recycled from War of the Chosen in the first place, being the repeater node graphic from psionic transmitter missions), but not the Resonance Pylon unit per se.
Resonance Pylons themselves are, surprisingly, classed as units rather than environmental objects; among other points, Blueblood will actually automatically target them with Faceoff, unlike environmental objects. This includes they have real turns placed within the Timeline (they're not visible, mind, and don't follow the normal distribution rules) that can be prevented by killing them and so on. It's also clearly a bit of an ugly kludge, in that Resonance Pylons are prone to slightly rotating in place when taking their turn in a manner that's clearly not intended, among other oddities they exhibit. They also share with Violet the inability to target them during the Breach Phase, though that's pretty clearly intentional.
Stats-wise, Resonance Pylons are too simple to justify me doing the full stat block; they have no attack, their only defensive stat is that they have 4 HP (6 if the Progeny are your final Investigation), they have 0 Mobility, and that's it. (Aside possibly Initiative, but I haven't found their Initiative in the config files and they probably don't use standard Initiative anyway) As for what they do, they add shield HP to allies. They start out the mission adding 2 Shield HP to a single ally apiece, though note that Resonance Pylons can in fact stack this effect, where two Resonance Pylons targeting the same unit will result in their target having 4 shield HP. At some threshold in moving through Encounters, they start being able to target multiple units at the same time, adding 2 shield HP to each target; this still stacks, but a given Resonance Pylon can't double up its targeting. (ie if there's three Resonance Pylons and one non-Resonance Pylon enemy left, the Resonance Pylons can add 6 shield HP to that enemy through their collective efforts, not 12) This spreading effect is also influenced by Investigation placement -if the Progeny are your final Investigation, the first 2 Encounters have the Resonance Pylons slapping shield HP on 3 units apiece!
Resonance Pylons themselves cannot be targeted by this effect. The shield HP lasts indefinitely, aside the qualifier that if a Resonance Pylon is destroyed any shield HP it personally generated will immediately go away. Notably, Resonance Pylons aren't treated as living enemies for the purpose of determining whether an Encounter is allowed to end; it actually is a valid option to ignore them. Also, note that Resonance Pylons are immune to all damage over time effects; don't chuck an Acid Grenade at them in expectation that the Acid Burn will finish the job, because it won't.
Wrapping back to Violet: Resonance Pylons always prioritize shielding Violet if possible. This intersects with her reactive teleport, in that if you, say, hit her for 8 damage and then can't follow up because she teleported away, it's entirely possible you only removed 2 actual HP and that she'll have another 6 shield HP by the time you have anybody ready to hit her again. If you keep walking right into this, you can easily end up dumping over twice her max HP in damage before she actually goes down, all while her buddies are free to attack because you've been ignoring them. Hence why I was saying I tend to ignore her to start; taking out Resonance Pylons and regular enemies tends to be just better all-around, with this even taking out Violet herself faster than trying to immediately focus on her is liable to.
Oddly, the config files seem to indicate Resonance Pylons were supposed to directly affect Violet's actual HP. I'm not sure if this is a cut mechanic or if I'm just misunderstanding what the relevant bits actually do, but it doesn't seem to be a still-functional mechanic.

Broadening perspective a bit, Take Down (Investigation target) missions have a rather interesting formula. I've mentioned before that 3 Encounters is the normal maximum number in a mission with only the very final mission being an exception at four Encounters, but in a conceptual sense the Take Down missions are made of five Encounters linked in a continuous chain.
A given run will only see three of these Encounters from a given Take Down mission, however. Which three your run sees depends on which Act you placed that Investigation in, with the start and endpoints being moved 1 Encounter forward by being one Act later.
That is, if you hit the Progeny first, you'll go 1->2->3 and then stop, whereas hitting them second will have you skip past the first Encounter and go 2->3->4 and stop, and of course hitting them last will have you skip past the first two Encounters and go 3->4->5.
I quite like this, as it makes variable-order runs have meaningfully different experiences with each Investigation's culmination, without requiring the devs to custom-craft three (or more) times the content for these missions. Among other points, boss fights get shuffled about; Violet is always in the final Encounter, for example, whether that means map 3, map 4, or map 5, and so you get different exact experiences with fighting her based on which of those maps you're fighting her in.
The game also uses it to narrative benefit; with the Progeny, for example, they're building a device in the building you're hitting, and how close they are to completing it depends on which Act you fought the Progeny in. If you hit them first, the device is very early in its construction, where you hear about how its completion was weeks away. If you hit them last, the device is in the middle of powering up as you arrive and there's talk about how close things came to disaster because it activating would've been catastrophic.
And this basic idea applies to every Investigation; the faction is working toward a goal, and the later you hit them the closer they are to completing their goal by the time you stop them entirely.
Which is nice! Games with significant plot components often have severe dissonance between the gameplay and the narrative, where the plot presents a ticking time bomb of a scenario such that some problem needs to be dealt with urgently or else disaster will occur, and then meanwhile the gameplay is a world in stasis, where the main plot won't move forward an inch while the player is off doing sidequests or whatever. In Chimera Squad's case, I was honestly expecting that the narrative design would be such that eg the Progeny's plot would be 'on pause' until such time as I picked their Investigation, and same for the other factions; that's usually how this type of 'pick which narrative you want to start with' choice works, even if it makes no sense to work that way as far as in-universe realism.
So it's a pleasant surprise to see a representation of people in the game world making progress based on something like time, rather than only doing things in response to the player tripping event flags. It's not perfect -for one thing, a given Investigation's initial mission is always the same, where the faction effectively waits on a specific task until your attention turns their way even though the initial mission of an Investigation is framed as you surprising the faction with the fact that you're now paying attention to them- but it's honestly surprising to see a game even try.
But back to the specifics of Violet's mission chain.
Map 1 is a lobby area that's built wider than it is long, with some high ground in the back. It's a pretty straightforward, normal sort of Encounter; if it weren't for Resonance Pylons showing up, it wouldn't stand out from the assorted regular maps at all, even though this lobby map is in fact unique to this mission. The main thing noteworthy about it is that it has High Cover pillars in each wing, and so it's easy for a methodical left-to-right (Or vice-versa) sweep to end up with a surprisingly rough endstate because a couple enemies are hiding in the High Cover and it's difficult to get a safe flank on them and all.
Map 2 is a bit of a janky gimmick map. The way you end the Encounter is that first you interact with an object to activate an 'anti-gravity sled' in one corner of the map, and then you get your entire squad into that corner. It's clear the idea is that you'll fight a running battle to the sled after you've activated it, with reinforcements pouring in to create the 'running battle' part, but said reinforcements only start after you've activated the sled; as such, the optimal thing to do is to set three agents inside the sled and have your fastest agent throw the switch and then come running. Done right, the reinforcements will get no turns at all, such as because you brought Torque and have her Tongue Pull Zephyr into the sled area. Even outside this most extreme 'don't play that part of the mission at all' scenario, there's multiple agent abilities that are really designed around the assumption that turns are always being taken with active enemies about; you can have Cherub put a shield on everyone before throwing the switch and have Terminal heal everyone to full at no resource cost, as a couple examples that interact jankily with this situation -note that the Tutorial team actually foists these examples upon the player! This mechanically optimal behavior is also tedious to actually play out, as one more way it's not great)
Aside that unfortunate jank, map 2 is an okay mostly-indoors environment. Among other points, it has solid walls completely breaking up line of fire, which is something Chimera Squad's maps usually don't do, or more accurately don't tend to make such walls strongly relevant; the map tends to stand out for this factor alone. Notably, these walls make it harder to trivially destroy all the Resonance Pylons with eg Faceoff; you're unlikely to get them all in the first Round.
It's worth pointing out that an agent Bleeding Out is not counted for purposes of determining whether your entire team is in the anti-grav sled zone. This leads to the counterintuitive result that you should simply ignore agents going down; getting the rest of the squad to the sled will end the Encounter and any downed agents will automatically be fine. Since agents entering Bleeding Out mode are out of action for the remainder of the mission anyway and Chimera Squad has no option for reviving a downed agent, there's no benefit to trying to Stabilize an agent if you can end the Encounter before their timer runs out.
Map 3 is a trashed-out cubicle office space area, and of course is where you'll fight Violet if the Progeny are your first Investigation. It's a fairly open map overall, but it has some odd hiding spots that Violet is prone to reactively teleporting into that can be difficult to get an angle on, and the map stretches sufficiently far that the back portion of it isn't actually within range of your agents' starting positions. Among other points, it's harder to Faceoff the entire room than you might expect, and the overall openness of the room doesn't actually mean you can readily take out Violet in a single Round; she's too prone to teleporting somewhere nobody can currently reach one way or another.
Regardless of whether you fight Violet here or not, there's reliably Codices as an additional complication, among other points making the room's size and weird hiding spots relevant even without Violet; it's easy to hit a Codex and end up with it teleporting somewhere you just can't follow up on, after all. I actually tend to find it the roughest part of the mission regardless of whether Violet is present or not, oddly.
Interestingly, if the Progeny are your final Investigation, your agents rappel into this room, giving them a very different starting position, much closer to the room's center. The dialogue doesn't mesh with this, in a manner that could easily confuse a first-time player, as Whisper still makes an allusion to how noisy the 'gravity sled' was... without actually directly referring to it, and even though your agents arrive in a manner incompatible with having taken the sled. Chimera Squad wasn't obviously heavily rushed like War of the Chosen was, but there's bits and pieces like this suggesting the devs didn't quite finish what they meant to do before it was release time.
Map 4 takes place atop the roof of the office building you've been working your way up through, and is something of a defense mission that can be made much easier by bringing a Breaching Charge; there's a part of the map enemies will try to walk to, where they're narratively trying to activate the device they've been building, and if enemies spend enough turns in the area in question you lose the Encounter. The default entrance is physically not very far from the area in question, but the map is an indoors environment sectioned off by walls where you can't readily walk into the area you need to defend; using a Breaching Charge instead places you right inside the area you need to defend. Enemies are prone to prioritizing walking into the activation zone, and doing so in the form of simply Dashing in without bothering to attack your agents; coming in via Breaching Charge can turn the mission into a shooting gallery where enemies charge in and get annihilated effortlessly over and over.
Violet shows up here if the Progeny is your second Investigation target, and this is arguably the roughest map to fight her on; much of the map is sectioned off by solid walls, where her reactive teleport can easily drop her in a wide variety of locations you can't reach immediately and her access to Null Lance lets her attack right through solid walls -a fact she is quite willing to take advantage of. Reminder that both the player and AI have full awareness of the entire map at all times; don't forget your own ability to hurl some attacks right through walls, such as Blueblood's Phase Lance.
This map is another case where the not-quite-complete element is obvious if you hit the Progeny last, as Whisper will allude to the idea that the device the Progeny built is already self-sufficient in terms of power, where it's clear the idea is that you shouldn't be doing the defense mission to prevent access to the power supply... but you still have to do said defense mission. So that's a little unfortunate, and potentially confusing to a player running into it for the first time.
Map 5 takes place on the actual outdoors part of the roof; this area is actually visible but greyed-out and inaccessible when in map 4. It's also surprisingly straightforward: the psionic device is visibly glowing but not relevant to the mission (Whisper will urge you to hurry up before it activates, but there's no actual timer or anything), and the only actually unusual quirk is that there's 6 Resonance Pylons arrayed around the device that, as soon as the Breach Phase is over, all pile shield HP on Violet, giving her a total of 12 shield HP. This is actually a little underwhelming given the Resonance Pylons in the prior Encounters have been hitting 3 enemies apiece; 4 Resonance Pylons targeting 3 enemies is a total of 24 shield HP to chew through, twice what these 6 Resonance Pylons are adding in total. And 4 Resonance Pylons isn't higher than what you'll be seeing in those Encounters!
In conjunction with the fact that you're by definition near the end of your campaign and so presumably sent in max-level agents with full Training, fully upgraded weapons and armor, and a collage of great gear, it's easy for this to end up being weirdly trivial compared to if you went after the Progeny earlier. Every time I've done the Progeny last, I've taken out Violet before she even got a turn -even though she is always placed before your second agent in the Timeline.
I kind of suspect the config file bit of giving Violet extra HP is supposed to kick in here. In general, the whole setup looks like something that was intended to be 'and now Violet is supercharged in myriad ways by the Resonance Pylons' to act as the centerpiece of the Encounter and then whatever was intended to be done simply wasn't, and so we're left with arguably the most boring third-Act situation, and certainly the easiest one.
-----------------
Narratively/aesthetically, Violet and her attendant mission continues the Progeny trend of murkiness.
The Progeny are building a device which they think will awaken psychic powers in everyone in the city when activated; you get told it would've just fried people's brains instead so you're the hero for stopping their plan, but it's a bit confusing that the Progeny have this plan at all. It seems at odds with the Progeny's overall cultish structure; if their organization is, as it seems to be, built around having something of a monopoly on ability to inculcate psychic powers in people and using that monopoly to indebt people to their organization (Among other points, there's a line claiming Violet personally awakened all Progeny human psychic abilities), then instantly passing out powers to everyone in the city is destroying that monopoly. It seems unlikely they instead realized they would've fried people's brains; the Progeny doesn't come across like its members would be perfectly happy to die if it meant taking a bunch of other people them, or anything of that sort. So this confusing goal seems to be in fact their actual goal?
This doesn't have to be nonsense -it's possible the Progeny think they would become the leaders of City 31 by virtue of everyone needing help with mastering heir psionic powers and so turning to the Progeny, for example- but my actual point is that what the Progeny are thinking with this plan isn't actually explained and isn't entirely, intuitively clear. (And that this is just one of many examples of this type of murkiness in regards to the Progeny)
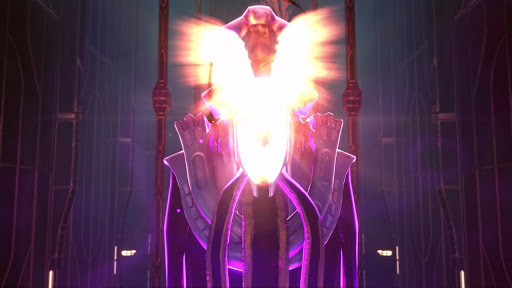
Similarly, it's not entirely clear why Violet would want to perform such a plan, which is rather important given she's the overall leader of the Progeny. We're told she's got psychic powers due to ADVENT science experiments, and there's a clear implication it was a pretty unhappy experience, a fact her design helps sell; the large patch of purple on her skull is presumably some manner of psionic contamination, and notably while her half-shaved hairstyle could just be a punk aesthetic thing it's worth pointing out that the purple discoloration is heavier on the right side of her head and that's where she's bald. It's entirely possible the right side of her head is bald because her hair fell out in response to whatever ADVENT did to her to get her psychic abilities, which would be a pretty clear indicator it was harmful to her health. The dark circles under her eyes are similarly meta-suggestive, giving her an appearance of significant sleep deprivation; while you can argue that from an in-universe standpoint that's coincidental, it's a pretty clear visual signal that Violet is probably meant to be in a very bad place physically and mentally, and honestly, even from a purely in-universe standpoint the fact that she has this purple crap discoloring the area around her eyes -which is one of the more direct connections to the brain- is a rather concerning symptom!
Even her lips are purple! I originally took that as more punk aesthetic stuff, like that Violet is just a fan of purple lipstick, but it seems likely it's meant to be more of this contamination. And in real life, discoloration of the lips tends to be a concerning sign; if your lips are blue, for example, you are literally in the middle of freezing to death.
So overall, Violet getting psionic abilities seems to have been a pretty raw deal. This isn't too difficult to reconcile with her creating the Progeny -she may be trying to avoid what happened to her happening to anyone else by virtue of having control over the awakening/teaching process- but seems at odds with this 'forcibly activate the psionic powers of an entire city of people' plan. It seems likely that Violet's personal experience would point to such a plan being emotionally and physically traumatic, causing irreparable harm to their health; why would Violet think this is a desirable thing to pursue?
Unfortunately, this is both a harder sell than the organizational layer, and also the game itself doesn't really try. Violet is mostly presented as 'unhinged'; we seem to be meant to take her plans as not making sense because she's A Crazy Person, which fiction unfortunately often takes as an excuse to not bother to imagine internally-sensible reasons for a character's decisions. This is problematic in general, but the approach is particularly glaring when you have a leadership figure who is obeyed by people underneath them; Violet at least needs to be able to appear to be a coherent thinking person long enough to relay a sensible-sounding framework to the Progeny. You can argue that we only ever see Violet when things are coming apart around her and so maybe what we see of her isn't really representative of how she acts around the Progeny normally, and that would be fair, but it wouldn't alleviate the murkiness issue any.
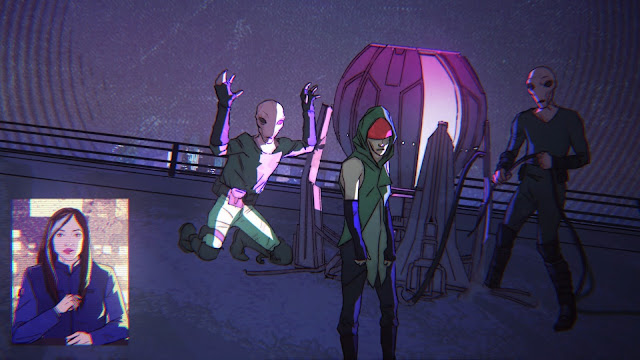
Also not helping is that the game seems a bit undecided on how it wants to present Violet. The bit of art I've used at the beginning of this post makes Violet seem like an angry or ominous figure, but her portrait when speaking seems to be meant more as manic, like she's cheerfully unhinged -which is rather striking given it's a portrait you primarily see in combat situations (It's also used in the Investigation data sub-page once she's properly revealed) where you're actively trying to foil her plans and do harm to her and hers. The reverse -ominously angry Violet in combat, cheerfully manic Violet when you're getting a between-mission overview of her- would still have me wondering if there was a consistency problem here, but would also just make contextual sense. Ominously Angry Violet would also fit if the game had decided that the 'fry everyone's brains' plan was in fact Violet's intent; one would presume such a Violet is lashing out in anger over how her life got ruined and all, after all.
(Notably, on a meta-level this would fit to her punk aesthetic; a big part of punk is anger at the world/society, which can include lashing out, up to and including lashing out in a way that causes harm to the angry individual but is deemed 'worth it' because a bunch of other people got hurt too who the individual feels deserve it. Given one of the other Investigation targets is a major group of ADVENT loyalists, it would be quite plausible for Violet to feel that City 31 is still an ADVENT holdout that deserves whatever happens to it)
As-is, it comes across like maybe the devs were undecided on Violet's character for a long time and didn't clearly commit to a specific model by the time the game actually released. I kind of suspect something like this is the core of so much of the Progeny's murkiness; there were two (or more) major possibilities the devs had in mind, they only really clearly committed to the bits that would be true no matter which possibility they went with, and then it was time for release before the devs actually figured out which option made the most sense/appealed to them the most/whatever. The Progeny having some obvious signs of unfinished bits contributes to this impression.
I am unfortunately somewhat doubtful the Progeny in particular will be meaningfully followed up on by XCOM 3, so it seems unlikely that later material will pick a specific model and clearly communicate it as far as all this goes. Alas.
----------------------------------------------------------------
Next time, we move on to Gray Phoenix, starting with an overview.
See you then.


Comments
Post a Comment