
Let's Play Monster Quest Part 23

 ... why are we here, again?
 You were invited by the Demon King himself.
 That doesn't sound right. I could've sworn we were following Lyon for some reason.
 In your infinite grace, beauty, and mercy-
 I'm maybe one of those things.-you of course elected to pursue the poor, frail, overly-emotional Lyon to comfort him in his time of need.I'm pretty sure it was so I could kill him because he was being weird and annoying.... it's a mercy killing?
 I'm just here because this is my home, don't look at me.
 I thought we were here to purge the weak in the Demon King's name.
 Lyon is weak. And also a rival for Eirika's affections.
 Really? THAT'S your motive?You'd do the same for Ephraim, don't pretend otherwise.
 I regret my oaths.
 I got my REVENGE, so I don't care about anything anymore.Look, just fight to the death and we'll all be happy. Motives and goals are totally unnecessary to a good narrative conflict!
 Sounds about right.
 I want cold hard cash.
 I'm okay with whatever Gerik is okay with.
 I'm a child and so excited about EVERYTHING!
 I actually can't fight.
 I've already been paid, not entirely sure why I haven't vanished on you lot already.
 I-
I- Am AWESOME.No, son, that's you. I haven't gained a single level. You're the one carrying around Garm.
 Best dad in the world, right there!Okay seriously-
 I'm a shifty thief but the best friend a girl could have! Or so Neimi tells me when she isn't yelping in terror or shooting flies out of the air just above my head.Which happens a lot, since I'm a rotting human corpse.
 I'm not entirely sure I have a personality.
 Yay wings!Uh, ahem, I mean my genius will carry us all to victory.
 I think I'm mostly just Lute's cheerleader at this point. I'll do my best regardless!
 I'm a sensitive artist and basically a brother to Ephraim. It's too bad I ended up having trouble gaining experience.
 I'm the serious Cavalier. In the base game. I don't even know what I am in this abomination.Kyle!You can't make me play along with this ridiculousness, don't try.
 I don't think anybody ever bothered to tell me what had been done with my homeland. I'm going to assume nothing but good things.
 The alternatives are too depressing.
 Does anybody even pay attention when I speak?
 I'm depressing. That's my character.
 I-
I- Okay enough talking, let's kill Lyon.
 That's next mission, actually.What? Who is going to be our narratively climactic foe for the single longest mission of the entire game? Riev, the generic priest who never did anything that mattered?
 My undead uncle who has never been mentioned prior to this mission....Please tell me you're joking.No. Also, even though I'm a 'love interest' for Ephraim, in his route that whole thing gets glossed over, where in this route you stumble on me mourning afterward and I make up a bunch of lies so you don't find out you re-killed my uncle.I'm forced to admit Ephraim is enough of a blockhead it's at least in-character.
 Cruel words, sister dearest.Name one smart thing you do on-screen in this entire story.Well there's-Actually smart, not 'the narrator insists it's smart even though it's clearly stupid'....
 Awww, I love you no matter how stupid you are!I think I don't like Eirika's friends.
------------------------------------------------------------

I'm not sure if this is the fault of the translation or what, but I've always found it pretty baffling that we get explicitly told earlier that Myrrh fought Fomortiis 800 years ago and then we suddenly in this mission replace her precocious badassery with her uncle being the one who did it, only to be stomped here to give us a narratively pointless boss fight.
And, I mean, even if the translation introduced the apparent-retcon nature of the whole thing, that doesn't stop this from being a baffling, pointless sequence.
I just don't get it.

I always forget Riev's motive is pretty much 'I did bad things, people got mad at me, so I doubled-down because it never crossed my mind they might have a reason for being mad at me'. It's so... un-self-aware and boring.
Anyway, speaking of Riev...


He's got ridiculous stats, mostly capped outside of Luck, and is still wielding Ivaldi.
Unlike the previous mission, Riev is willing to move in this mission, so I'll have to be extremely careful. Against most of my units, he's going to have alarming odds of crit-killing them. Ideally I'll have Neimi snipe him with Nidhogg and use Tethys to either Rescue her out of range or send someone else in for the finishing blow if Neimi doesn't one-round him.


Morva is the other boss here. I'm pretty sure he's also willing to move. Wretched Air of course completely ignores damage reduction and has an absurd hit rate, so HP is really your only defense against it; anybody with 40 or less HP should never be allowed a chance to be hit by Wretched Air. And it has a base range of 1-2!
Surprisingly, it doesn't look like Monster Quest has messed with Wretched Air's stats. The stat bonuses are normal!
On the plus side, unlike Luna my recollection is that Wretched Air is incapable of critting, so even though Morva would kill even Fomortis in one hit if he crit, it shouldn't be a worry. And even if it is, most of my party has more than 14 Luck.
Plus?
I usually just cheese him with a Longbow -and Nidhogg is a super-Longbow in Monster Quest. Thanks to the temple limiting his movement, I shouldn't need to let him attack anyone at all.
As an aside, I've always found it curious how his class is Manakete instead of Dracozombie. I've long wondered what drove that decision. Yes, he does have a custom set of sprites that resembles Myrrh's dragon form but zombified, where all other Dracozombies are rather different in pose and all, but... he's still a dragon zombie, and Sacred Stones never attempts to suggest that other Dracozombies are zombified versions of some non-Manakete dragons.
What's especially odd is the generic Dracozombie portrait resembles Morva's battle sprite far more closely than it does the generic Dracozombie combat sprite.

There's also four Arch Mogalls on the map with Shadowshot... and unlike the base game, it's been given unlimited uses. That's a bit alarming. Normally I solve this problem by having them burn through their shots before approaching. It's slow, but this map is designed to punish aggression anyway.
Fortunately, I've got some really good tools for trying to deal with this, so while this is a bit disconcerting it's not actually that worrying.
The mission itself is a breather after last mission's fog shenanigans. If you got through the last mission, this one is probably effortless, bar maybe you getting someone killed by being too aggressive or having people split up.
Monster Quest upping monster quality makes this a bit less true, but I only had one failed attempt at this mission, and that failure occurred really early on due to my usual over-aggressive tendencies.
Mostly, the mission is long. I took 700 screenshots for this mission, and that's with me skipping a lot of the screenshots I'd have historically taken!
On the plus side, something that didn't occur to me until I was writing up this post is that this mission has no Revenants or Entombed, meaning I didn't have to worry about stealing back my stolen stuff. Nor have to worry about random Silencer triggers. That could've made this a lot more frustrating.
Anyway...
to be silencer


I always forget you get an extra-huge group of units on this mission too. In part because honestly I normally end up using this mission to train up some more people... which I ended up doing this time, too, but it was a lot more important to have a large portion of my team pulling their weight.

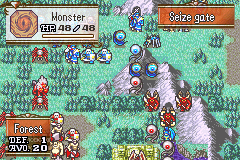
Starting positions; fliers ready to go west, everybody else heading north.

Tethys fixes up Artur's Flux for lack of anything better to do.

End turn looking like this.
Darkling Woods has a mix of monsters that go after you right away, monsters that only charge when you get in their immediate strike zone, and a few monsters (The Shadowshot Arch Mogalls) that will never move at all. In this case, there's Gargoyles to the west that will advance on their own, while the Wights will wait to be provoked. So better to wait for the Gargoyles to arrive, instead of trying to fight everybody at once.
Not being cautious here is what got Ewan killed in my first attempt.
Anyway.


Ephraim is attacked by a Wight.
It dies.
Then it's my turn again.

First, I adjust my western fliers to let the Gargoyles get closer without an opportunity to attack anyone; there's still more Gargoyles approaching from the west.

Then in the north, Eirika murders this Bow Wight.
In retrospect, maybe I should've tried to keep one of these alive to try to train up Ewan and Gilliam? Not sure how practical that would've been, but it didn't even occur to me at the time.

Then Amelia murders a melee Wight.


Then Neimi takes out another melee one, which drops a Steel Sword that's promptly shuffled off to the Convoy.
Honestly, I should probably sell some more of my eeeeh weapons like this, make room. Admittedly, I'm not sure what I'd buy right now...


Then Franz wears down the remaining Bow Wight -partly because he's in reach, but partly because I'm desperately trying to get Franz's Sword rank to S so I have someone to wield Audhulma.


For the finishing blow, Tethys gets Knoll another turn -this was admittedly sort of risky, except that Marisa would handle it if Knoll had failed. And I really want Knoll promoted and ideally at S Dark ASAP.
I end turn with basically nothing else happening.


One Maelduin flails uselessly at Franz and nearly dies. Awesome, maybe I can get Ewan a kill or something.


The other Maelduin in reach goes for Colm, and amusingly has the same hit chance and worse damage than against Franz even though there's no weapon triangle here.


Lastly, the Gorgon tries to go for a crit-kill on Colm and fails to even hit him.
Uuugh, I really hate low crit chances like that.

Then the enemy turn ends with a couple of Cyclops pouring out of this mountain.
It's worth noting that this map has a lot of reinforcements, and most of them are aggressive. It's a big part of where the punishing aggression comes into play, as trying to move forward to attack these reinforcements will often lead to being baited closer to passive-but-dangerous enemies and end up biting off more than you can chew. The Arch Mogall with Shadowshot up there, for example, can easily punish a player who isn't being careful about their approach because they're too fixated on the Cyclops.


Anyway, down south Ewan softens up a Gargoyle for the experience -he can't actually reach the Maelduin up north.


Myrrh follows up, softening it still further.


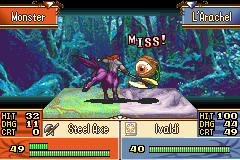
L'Arachel-
Incinerates them with the infinite and ruinous power of the burning sun!-shows off Ivaldi. Which, being a Light Tome in Monster Quest, murders Monsters.
More so than in the base game, in fact, since in the base game the Sacred Twins use a x2 multiplier for their monster-killing effects instead of the x3 effect used by all other 'effective against so and so class of units' effects in the entire game.
Honestly, Monster Quest is a lot more justified in taking so long to give you Ivaldi than the base game. Ivaldi is... okay in the base game, but effortlessly outshone by a Bishop using Aura or Purge. Heck, Divine -the C-rank Light Tome- ends up with exactly the same power against Monsters when wielded by a Bishop, with more crit chance and only a slightly lower hit chance and admittedly 2 more Weight. In Monster Quest, though, Ivaldi is pretty much a way to make a monster disappear in one turn just about no questions asked.
L'Arachel is, in fact, going to be one of my main troubleshooters throughout the rest of the mission primarily on the strength of Ivaldi... plus her monstrous Luck and otherwise good defensive stats.
Oh, and the Gargoyle dropped an Antitoxin, but I have Latona so I don't care. Free money, I guess.


Anyway, Artur continues trying to train up his Dark rank by finishing off the Gargoyle Ewan and Myrrh softened up.


Followed by Tana ranging out to wipe out a more distant Gargoyle to keep Myrrh and Ewan safe -she's tough enough to not really be in danger from what can reach her.


Neimi takes out the Gorgon so nobody else has to risk being hit by it.


Tethys helps Ewan to reach the Maelduin from earlier and gets a... well, Magic and Speed are the things he most desperately needs to get more levels and stop being so dang vulnerable to being doubled, so I suppose it's not actually a bad level.


Franz keeps working on training his Sword rank, opening the way for-


-Knoll to get a nice level. He may yet be usable in the final battle! Maybe.


Amelia takes out another Wight while blocking the Maelduin from Ewan just in case I fail to finish it this turn.


Eirika ranges out north, confident in her terrifying stats to ensure she'll survive while thinning out the Maelduin up here. Also, she misses one of her attacks on this Maelduin, which caught me so off guard I failed to screenshot it.
Interestingly, Eirika isn't vulnerable to the Swordslayer. I'm almost completely certain she is in the base game. I'd maybe guess this is what the readme was talking about when it said the plot-promotions will mess up Eirika and Ephraim, but then I let the plot-promotion hit Eirika so... I really have no idea why this would be different, if I am indeed remembering correctly.
Regardless, it's why I was okay with sending Eirika after this Maelduin. I don't want it getting into the thick of things with my Wights, who should be vulnerable to Swordslaying.


Ephraim, meanwhile, wipes out the closer Maelduin, mostly because he's my last ranged guy in the area that isn't the already hilariously overpowered Ross.

I end turn with the northern area looking like this.


A Gargoyle goes for Vanessa, misses, and is instantly crit-killed for its trouble.
Not sure why it didn't go after the Arch Mogall right next to it.


A Lancereaver Wight goes after Tana, dies horribly to give her an okay level and drops its Lancereaver.
That's another thing about this map, actually; Reaver weapons show up quite a lot. If you're not paying attention, it's easy to do something like toss a Swordmaster at an oncoming horde of Axe monsters and have them instantly die because you didn't realize they included a Swordslayer. I didn't bother to take screenshots noting down all their locations because this is a ton of screenshots as-is, but you can basically assume any group of enemies that looks mono-weapon includes a Reaver in there -including from some of the reinforcement streams.


Anyway, the first Maelduin suicides on Eirika.


The second can't even hit her, so I don't bother to screenshot the miss so there's a bit more in the way of screenshot variety. Also, the Maelduin still dies horribly, gives Eirika a Perfect Level (Given she's capped everything else) and drops a Vulnerary I don't care about because Latona.


Third Maelduin suicides on Eirika, this one being the Swordslayer one. And he even actually hits her! But whatever, she's fine and I have Latona.


The fourth and final Maelduin suicides to no effect.


Meanwhile, back more southerly, a Mogall suicides on Tana and doesn't even hit her.


Followed by the last Wight in the area catching me off guard by tossing a Javelin at Vanessa -I'd forgotten to check if she could be reached by any ranged Wights that might be in the area.
Not that it mattered, really.

Lastly, reinforcement Cyclops continue to pour out of that one cave.

I set up Knoll to bait out another Mogall, careful to stay out of Riev's reach.


Myrrh takes a shot at the Javelin Wight for free experience -it doesn't matter that everything doubles her when their weapons tink off her hide to no effect.


Finally, Vanessa finishes off the Wight and gets a fantastic level out of doing so.

Tethys heals everyone while I fail to think of any funny observations to make about this sprite.

I set up the north like this -you might already see a mistake I made.


L'Arachel moves up in preparation to smite the southern Shadowshot Arch Mogall.


And then it's the enemy turn, with the Mogall Knoll was supposed to bait out going for Colm instead.
Oops.


The southern Arch Mogall fails to hit L'Arachel, unsurprisingly. And she can take three hits from it without dying anyway. And I have Latona.
She's an unstoppable juggernaut as far as that Arch Mogall is concerned is what I'm saying.


Lastly, more enemy reinforcements show up, this time including Gargoyles from that northeastern cave.

L'Arachel isn't quite able to get close enough to fire the Ion Cannon at the southern Arch Mogall, but whatever, it's fine.


Knoll softens up the Mogall he was supposed to have baited out, and improbably dodges its retaliation.

Opening the way for Franz to one-shot it.

For lack of any better ideas of what to do with her, Tethys fixes up Ross' Killer Axe.

Some more moving up happens, including Amelia is actually set up to bait out the ranged Gargoyles, and I end turn looking like this.


First Cyclops goes for Colm, who actually can't hurt it but tries real hard with a crit. I was half-expecting it to be a Silencer trigger.
And note that once again there's a small chance of Colm being crit. At least Cyclops have the crit bonus to explain this. And also I'm stupidly not keeping Neimi in Friendship Range.


Second Cyclops has better luck, actually doing damage.
Still, I decide to be more careful with Colm from here on out. It was highly unlikely, but if one of these Cyclops had crit Colm and the other hit him, he'd have died, and it would've been totally unnecessary.


The two ranged Gargoyles suicide on Amelia.


L'Arachel continues to dodge Shadowshot attempts.


And then it's time for more reinforcements, now including Deathgoyles in the southwest.
I've long been pretty sure the reinforcement chains on this map are triggered by you moving forward, and a check of Serenes Forest confirms this is true, which is one more way the map punishes being overly aggressive; if you kill reinforcements as they arrive and refuse to go further forward until a wave seems to have stopped, you're a lot less likely to get overwhelmed.
It's one of the few times in a Fire Emblem game I felt like reinforcements were being used in a purposeful way that's actually good for the game design. Much more often in the series, reinforcements are designed to essentially ambush your units, punishing you for playing smart.
Anyway.


My turn opens with L'Arachel getting a gratuitous crit-kill and a fantastic level. Capped Luck!


Knoll fails to gain some (real) experience off a Cyclops.


Myrrh is more successful.

Lute vaporizes the other Cyclops.


Eirika softens up the first Cyclops some more.


Then Franz goes in, and nets himself a somewhat underwhelming level out of finishing off the Cyclops. He needs Luck, admittedly...

After a fair amount of consideration and frustration at realizing I could maybe have softened this Gargoyle up for an Ewan kill or the like if I'd not fixated on the Cyclops, I end up having Amelia jus instant-kill it.

Tethys tops everyone off.

Lastly, I get everyone into position to protect vulnerable people while still being ready to fight the Cyclops that are coming.


Franz laughs off the first one, thanks to his Forest spot nearly erasing their accuracy.
No other Cyclops are able to reach my people this turn.


Instead, Amelia once again slaughters two Gargoyles on the offense -and this time, one of them couldn't even damage her.
My turn comes back quickly.


I open by having L'Arachel flee from the oncoming southwestern Deathgoyles while Tethys Rescues her to get her closer to safety.
You can see how soon the Deathgoyles are going to get here.


Franz continues to fail to get crits, which is mildly improbable at this point but hey it's actually kind of convenient!


Specifically, it opens the way for Knoll to land the finishing blow and reach his final unpromoted level. Awesome. It's even a decent one, even if I'd like even more Speed on him. And Luck. He's no base game Knoll, but his Luck is still bad.


Eirika goes to soften up another Cyclops while I'm half-expecting a crit-kill.


I have Vanessa go to soften up the melee Gargoyle, thinking I'll maybe have Ewan grab a kill... and she instantly crit-kills it. Dangit.


Neimi wipes out the Cyclops Eirika softened up and gets a pretty decent level when you consider she's got two capped stats already.

Then there's general shuffling about, and this is me showing what the two Cyclops can reach -their deaths, or Franz.


The first Cyclops wisely chooses Franz, and Franz continues to not get crits.


The situation repeats with the second Cyclops.

And then it's my turn, and time for more Deathgoyle reinforcements.

This is me double-checking Riev's range. That's... a problem. I can kill the lead Deathgoyle with a ranged flier, but the other two would be risking Riev and Morva's wrath.


Nonetheless, I focus first on cleaning up the Cyclops, starting with Franz continuing to soften one up.


His ongoing lack of crits leads to Ewan getting a kill, to my surprise. Excellent.


I end up deciding to have L'Arachel vaporize the front Deathgoyle and then get Rescued by Tethys so I can make more space for the Deathgoyles to advance.


Myrrh flies away from the Deathgoyles and softens up the Cyclops while she's at it.
In retrospect, I maybe should've seen about having Tana or Vanessa soften up the Cylops so Myrrh could finish it, but oh well.


I end up giving the kill to Artur, still training his Dark magic up as a back-up plan to using Knoll for the role.
Then I finally get around to Knoll's promotion.


The Path Not Traveled: Knoll could be a really cool-looking snakewoman and, as usual with the Gorgon promotion, get lots of Constitution and an overall stat boost.


The Path Actually Traveled: Knoll turns a kind of brown-black and gets slightly better defensive bonuses, but less Skill, Speed, and especially Constitution. But he's also a versatile master of magic, and more importantly he still flies.
Moving around happens and I pass a turn without getting a proper screenshot for it, so the next thing you'll see is;


Knoll softening up one of the Deathgoyles now that they've moved closer.
There's two Cyclops next to the Cyclops-spawning cave that don't move unless something of yours gets into their reach, you can see one of them right now. It's part of what makes the Arch Mogall north of them a nasty pain.


Myrrh softens the Deathgoyle up further...


... and Ewan fails to land the kill. Dangit, Ewan.


Tethys giving him a second chance leads to the same result.
Ugh. Ewan has so consistently had trouble hitting things this run it almost doesn't matter that his stats are worse than regular Ewan's too.

Disappointed, I give Marisa the kill -she's done more or less nothing so far, actually. On this map you honestly have more people than you can really get contributing most of the time, especially since splitting up is so dangerous. Monster Quest making enemies more powerful helps, but at the same time I've got some amazingly powerful combatants who generally don't need help.


Anyway, Artur softens up the other one, and man that would be so perfect for getting a kill on...


I end up giving Vanessa the kill, which was technically risky but I'm wanting Vanessa at S Lances as well and... frankly, I was flagging at this point and hadn't realized how impaired my judgment was.

I end turn looking like this, aaaand...


... all that happens is the Deathgoyles move up, more Deathgoyles spawn in, and some Mogalls spawn from the Temple.
Notably, some portion of the Mogalls that spawn from the temple aren't aggressive.

I double-check Riev's range to confirm that no, I can't really afford to head out and attack the Deathgoyles and Mogalls.

Tethys fixes up Knoll's Flux, and then...

... I have everyone back away so the Deathgoyles are forced to close more. (And, I thought, the Mogalls; I'd forgotten they're not aggressive)


One Deathgoyle goes for Neimi and dies horribly for its efforts.


The other takes a potshot at Colm, whom I'd thought it couldn't reach. Whoops. Not that he was in any danger, mind...

And then more Mogalls spawn, with two of the ones that spawned last turn having charged forward while one stood still.

I open my turn by bolstering Eirika and Ephraim's Support to B.
Let's bond.Certainly, brother dearest. We obviously have a lot in common, this should be easy.......Mercenaries are cool.Mercenaries are filthy sellswords who can't be trusted as far as they can be thrown.You seem to be fine with Marisa.She's unswervingly loyal to her lord-equivalent, who himself violated his mercenary code to stand by Innes because it was just rather than because it would get him paid. Cormag is more mercenary than either of them. Revenge!!... I see.Okay, we've talked, are we better dealers of destruction now?I'm starting to wonder if we're not twins at all.

Then the turn proper opens up with Franz softening up the Javelin Deathgoyle and failing to even take a hit.
I was fine with the possibility of a crit because Latona.
Also note that Franz is now placed to bait out a Cyclops while being just outside the range of the Shadowshot Arch Mogall.

Then Tana finishes off the Deathgoyle even though it feels a bit like overkill. I'd wanted to give the kill to, like, Myrrh or something, but the characters who most need experience couldn't attack it safely.

Neimi vaporizes the other Deathgoyle.

Since no healing is necessary or anything, I have Tethys Hammerne Ewan's Fire Tome.

I end up shuffling people around to avoid danger to my most vulnerable units and end turn looking like this.


The Cyclops is successfully lured, and chipping it down nets Franz a really good level. Awesome.


The Mogalls both go for Franz to no effect.


Lastly, more Deathgoyles show up in the southwest, plus a batch in the northwest. That could be annoying.

I send L'Arachel up to be positioned to attack the Shadowshot Arch Mogall next turn. I'm thinking more Rescue-the-Staff shenanigans.


Combat begins, starting with Franz wiping out the Cyclops -I'm not sure I can afford to mess around with trying to feed it to Myrrh or whoever.

Neimi murders one Mogall, a farther-out one so I can avoid bringing other people too close to Riev or the Shadowshot Arch Mogall -I actually wanted her attacking the Mogall just below it, but she can't reach it.


Myrrh takes advantage of her hilarious Resistance to get a free shot on another Mogall... and, surprisingly, crit-kills it!


Then I have Tethys fix up Eirika's Lancereaver because why not and shuffle things around to protect vulnerable members yadda yadda.


The first enemy to come to me is a Deathgoyle that finally lands a hit on Franz, and gives me a bit of a start because I'd forgotten to consider that Deathgoyles have +15 to crit and so he's in a lot more danger than I was thinking. No crit, fortunately, but he does finally get hit.


And thankfully the Mogalls can't do a lot to him.
But he could have died here, with worse luck.


Then the Shadowshot Arch Mogall wastes its time missing L'Arachel.


Followed by the last move of the enemy turn; the other Deathgoyle missing Franz.
And reinforcing that Franz could easily have died here.

My turn again, no reinforcements, so I open with Myrrh exchanging blows with the Javelin Deathgoyle.
Well, actually I opened up by moving L'Arachel back and away from the northwestern Deathgoyles. I'm not convinced it's a good idea to try to nuke the Shadowshot Arch Mogall and Rescue Staff her after all.

Anyway, Franz finishes off the Deathgoyle that attacked him in melee.


Followed by Vanessa finishing off the Javelin Deathgoyle in melee.
Again: even with a crit, I've got Latona.


Knoll gets his first post-promotion combat, exchanging blows with a Mogall.
This weakens it enough for...


... Ewan to continue to disappoint me.
At least he's tough enough to survive the double-retaliation. That's better than what I've been dealing with.

Neimi vaporizes the last Deathgoyle.


Ross contributes by wiping out the still-fine Mogall.


Tethys heals everyone and I re-confirm nobody can be reached by the Cyclops, and I end turn looking like this.


To my pleasant surprise, the Mogall targets Ewan... and he misses on his retaliation again.


Then more reinforcements arrive; still more temple Mogalls and northwestern Deathgoyles.

Not willing to take more risks with Ewan and considering it too dangerous to try to have Gilliam land the finishing blow, I have Ross wastefully finish off the Mogall at range.
In retrospect I'm not sure why I didn't use Myrrh.

Eirika charges north and vaporizes a Deathgoyle from a Forest tile. She'll shrug off the Shadowshot.

L'Arachel charges forth to vaporize another Deathgoyle -notice that it has an Axereaver. Every wave from the northwestern cave has included an Axereaver.


Tethys heals everyone (Mostly Ewan) and I shuffle people so the Deathgoyles can't get at people I don't want them attacking.


The northern Deathgoyle suicides on L'Arachel -this was planned, though I'm pleasantly surprised she dodged.


One of the southwestern Deathgoyles gets itself crit-killed by Tana having done minor damage against the odds.


Then a Mogall is even more suicidal, though it too hits.


Followed by another Mogall suiciding, this one to no effect.


The Shadowshot Arch Mogall continues to fail to hit L'Arachel.


Lastly, the final southern Deathgoyle gets crit-killed too while missing.


My turn now, I open with Tana backing away and soften- excuse me, crit-killing the remaining Deathgoyle.
I'd wanted to feed it to Ewan...

Tethys heals everyone, which really just means Tana but whatever.


I move people around and re-check strike zones -you can see I'm trying to lure out a Mogall without provoking Riev.
You can also see I inexplicably made a really, really dumb mistake without noticing it.
Somehow.


And there it is: I somehow failed to realize that I'd placed Knoll in reach of the Cyclops.
Even though I took a screenshot illustrating exactly that.
And I could've still moved Ross in the way to intercept it!
It's at this point I decide I'm clearly out of it and need to take a break and come back to the mission tomorrow... though there's still the rest of the enemy turn to get through.


So yeah, down south Artur successfully baits out the Mogall, laughing at its pathetic damage.


The Arch Mogall finally hits L'Arachel, surprisingly...


... followed by a Deathgoyle I carefully ensured could reach her missing her.
She was in no danger, unlike Knoll.


Reinforcements stream in again, more northwestern Deathgoyles but now also Maelduin in the southwest.

With Artur having successfully baited out the Mogall, I... well, I'd intended Ewan to finish it but as previously covered I was out of it on the previous turn, so he's not in range. I settle for Vanessa finishing off the Mogall, as I'm still trying to get her to S rank. It does provide a tiny stat boost, after all, and maybe I'll want Vidofnir on her at some point soon.


Ephraim and Franz each vaporize a Deathgoyle, Franz getting to continue building up his Sword rank because Axereaver, which clears the way for...


... L'Arachel to finally wipe out the Arch Mogall up here and get an okay level out of it when you consider what her stats are already like. Defense and HP would be nicer, but whatever.


I proceed to have Myrrh and Amelia soften up the Cyclops...


... and finally Ewan fails to disappoint me, getting the kill and even getting a good level out of it.
Oh, and there's some more free money I guess.


Tethys heals everyone and I end turn looking like this.


A Bow Wight goes for L'Arachel, and for its trouble it gets instantly crit-killed.


The next Bow Wight is wielding a Longbow, so it gets to survive its futility.

And then more temple Mogalls show up, plus Deathgoyles from a cave inconveniently right on top of me -this wouldn't even be so bad in the base game, since Riev wouldn't be able to fly, but as-is this is really inconvenient.


I open by having Vanessa soften up the nearest one...

...which opens the way for Myrrh to finish it off.
It's getting kind of frustrating how slowly Myrrh levels in Monster Quest.


Lute flies up and completely annihilates another Deathgoyle because it turns out Excalibur kills fliers in Monster Quest. Useful! That gives me another tool for dealing with Dracozombies!
Oh, and Lute got a fantastic level out of it too.


Tana comes in and softens up up the remaining Deathgoyle so Artur can kill it, and they both get pretty good levels out of it, Artur more so -which is good, since he needs good levels more than she does right now. Look at how she has nearly twice his Luck!

I do some more shuffling about in preparation for the oncoming waves, and... did I really forget to have Tethys Hammerne or the like? Oh, wow, I was still out of it during this part, dang.
Regardless, I end turn and...


... we open with a Deathgoyle suiciding on Eirika for a free hit point.


To my surprise, the next Deathgoyle goes for Ross, crits him for an alarming amount of damage, and even gets to survive because one of his retaliations misses.


Then a Mogall suicides on Tana to no effect.


The next Mogall does the same, just on Ross.


Another Bow Wight charges in, with no chance of doing anything to Ross, and dies for its trouble while giving Ross a perfect level if I'm remembering his stat caps correctly.


The Longbow Wight elects to take a potshot at Marisa, which I hadn't realized it could do.
As an aside, while I was working on this post I ended up learning that the Stone Shard isn't something invented by Monster Quest. It's an item in the code that got showed off several times in previews, and the Japanese name suggests a connection to Lyon's 'Dark Stone'. The general intention seems to have been that some monsters would have been stronger than usual by virtue of having been given Dark Stone fragments or some such, both in lore terms and in gameplay terms, but in the final version of the game the item is dummied-out, with no icon, and if you hack it onto a monster the game will crash when they attempt to attack with it.
So Monster Quest did put in actual effort into the Stone Shard -giving it a graphic and making it actually function- but it's not out of nowhere, and the fact that Lyon drops it in that first battle is probably a deliberate nod to the connection to the Dark Stone.
It's really neat!
But back to the battle.


The Gorgon up here, to my surprise, goes for a Demon Surge on Eirika instead of a Stone. Not that it achieves anything regardless...


The last nearby Deathgoyle takes a potshot at Marisa, but misses as well so whatever.


Then more reinforcements arrive, Maelduins from the southwest and more Deathgoyles from the northwest.


Myrrh finally gets a level off of finishing off the Deathgoyle that hurt Ross, and I'm a little frustrated she didn't get Luck. I dunno, maybe it'll ultimately turn out she can level a lot more than usual, but if she has the usual max level of 20 her poor base Luck and apparently iffy Luck growth is kinda aggravating.


L'Arachel instantly crit-kills the Gorgon, which is even mildly convenient.
Have I mentioned the Mogall/Arch Mogall crit animation is amazing-slash-terrifying and it's so disappointing you'll probably never see it in normal play?


Ewan fails to disappoint again- wait, why didn't I use *Thunder here?
Whatever, it worked and Ewan got an... okay level. Speed and Magic are by far the most important things for getting him able to keep leveling...

Knoll finishes off the Deathgoyle that went after Eirika.


Eirika ranges out now that she's free and effortlessly slaughters the Longbow Wight. The Longbow goes into the Convoy.


Vanessa crit-kills the Javelin Deathgoyle, getting an eh level out of it and reaching S in Lances at last!
I'd sort of intended to feed the kill to Franz or something, but okay.


Tethys heals everyone and I end turn looking like this.

One of the reinforcement Maelduin suicides on L'Arachel to no effect.


The next Maelduin -this time one of the ones that's been patiently waiting much of the map- suicides on Eirika instead, dropping its Swordslayer in the process. Awesome, into the Convoy.
I mean, Ross already has one and I have infinite Hammerne uses, but still.


Another suicides on Eirika to no possible effect...

... and WAIT WHAT NO WHY IS RIEV MOVING-

-oh never mind Eirika crit-killed him and has capped ALL HER STATS.
No, I didn't deliberately bait Riev out with Eirika at this time. I just forgot to check how far north he could range. This was blind luck -while I don't think he could crit-kill her, if he'd gotten a crit and one of the Maelduin had hit her, she could have died here.
Though I'd also apparently been underestimating how tough she is, because like I said I wasn't planning on baiting him out with Eirika at all because I'd thought he could potentially crit-kill her.
This is the best Eirika I've ever had.


Anyway, the last Deathgoyle goes for L'Arachel and... actually survives, surprisingly.

Then- wait hold on THAT'S EWAN WHAT-


-huh.
Turns out Ewan was completely safe. It would've hurt if he'd been hit, but he couldn't be crit and wasn't being doubled.
Still, I utterly failed to realize that Maelduin had a bow.
Seriously, I was just a travesty of dubious decisions in this part.


In less heart-stopping news, the last local reinforcement Maelduin flails uselessly at Franz.


While one of the non-reinforcement Maelduins turns out to have a Bow and goes for Eirika -the fact that it's fighting from a Forest avails it nothing. Eirika is unstoppable!
Oh and there was more free money I guess.

Then some reinforcement Deathgoyles pop out of the local cave, but now that Riev is dead I'm not terribly worried by that.


Franz opens the turn by softening up the Hand Axe Maelduin that went after him earlier, netting him a pretty nice level!


L'Arachel continues to nuke things from orbit so we can be sure, and gets an eh level out of it but her stats are already ridiculous so whatever.
I mean, Defense would be nice, but Ivaldi is granting her 5 points so it's not too big a worry.

Due to accidental clicking while considering my options, Myrrh ends up softening up one of the Deathgoyles without a pre-combat report screenshot.

Lute annihilates a Deathgoyle.


Tana gets another instant crit-kill, but okay whatever.

Followed by Artur finishing off the Deathgoyle Myrrh softened up. He's finally doubling things sometimes!


Two Deathgoyles and a Maelduin are wiped out, and I pin the Bow Maelduin in place and finally Gilliam gets to actually gain some experience!... it's a disappointing level given his HP growth is over 100%, though admittedly his Defense is capped but still.
Maybe I'll manage to actually grind him to level 20 and promote him this mission!


Tethys heals everyone and I end turn having done some shuffling up.
I actually didn't notice at the time that Marisa was in range of the Maelduin. Because I was an idiot during this session.


A Maelduin charges up to Eirika with no chance of hurting her, Halberd or no, and she nets a dead level. So yeah pretty sure Monster Quest hasn't let the player bypass the 60 HP cap.


Another Maelduin provokes Eirika's wrath, and dies for its trouble.


Then the pinned Maelduin hits Marisa. Ow. Oh well, it's fine, at least she wasn't capable of retaliating and so I've still got a font of experience for Gilliam and to a lesser extent Ewan!


Then even more reinforcements show up: four Elder Baels from the west, a Gwyllgi from the north and south and one from the west with the Elder Baels, plus three more Maelduin from the southwestern cave.
The Gwyllgi and Elder Baels actually come in from off-map, unusually for this map. All the other reinforcement sets come out of a cave or the temple.
But as for my own turn...

Gilliam gets a bit more experience off the pinned Maelduin.

L'Arachel instantly nukes the northern Gwyllgi.


Myrrh... fails to soften up a Mogall on a 93%-before-True-Hit chance, but whatever the real point was to get the Mogalls ganging up on her because they can't touch her and she needs experience and it's hard to get her into fights that aren't risky.

Eirika wipes out a Maelduin...


... and I show that she's actually just out of reach of some of the other enemies in the area.


Franz goes for the other Maelduin, finally hitting S in Swords! Huzzah, Audhulma is actually useful now!

Ewan gets his own hit in on the pinned Maelduin.


Then Tethys fixes up Franz's Javelin and I end turn looking like this -note that I did Something Dumb again. You can see it right now.


Mogalls pile onto Myrrh, one of them dying for its trouble. And... I'm either missing a screenshot or didn't bother to screenshot that last one.


Then the northern Mogall goes for Ewan, and he misses again on his retaliation.


And here's where my mistake shows through -I put Artur in range to be attacked by and thus counterkill the Maelduin, cutting short its experience fountain utility.
I think it ended up working out in the end, as the way reinforcements worked out I might've been forced to restart if I'd actually succeeded in keeping the Maelduin pinned long enough for Gilliam and Ewan to get maximum experience out of it, but at the time I was pretty galled by how blatantly stupid an error this was on my part.
Anyway, more Deathgoyles pop out of the nearby cave, and it's my turn again.


I proceed to wipe out two of them with Lute and Ross -I've got too much going on to try to feed the Deathgoyles to Ewan or whatever.

Over more west, after a bit of trying to figure out what avoids putting too many people in too much danger, I start out by having L'Arachel nuke the northernmost Elder Bael.


This is followed by Eirika softening up the surviving Gwyllgi and Neimi finishing it off -I don't want its lightning-fast hyper-critty self running about causing chaos.


Tana crit-kills the last Deathgoyle, which is a bit annoying because I was hoping to use it to give Ewan experience now that I'd gotten the overall area under control-ish.


Myrrh continues her anti-Mogall rampage, careful to avoid being in her uncle's range.


Knoll softens up the remaining nearby Mogall...


... and I end up giving Neimi a second move so she can get out of the way of Franz popping up next to Eirika and pulling Audhulma out of the Convoy over the Poison Sword.


Franz finishes off the Mogall Knoll hit after I determine I can't arrange to soften it up for Ewan to snatch the kill.

And I end turn looking like this.


The closest Elder Bael can't even touch Eirika, but surprisingly survives the encounter due to a lack of crits.


The closest Maelduin goes for Tethys, which is deliberate -seriously, she's hilariously hard to kill in Monster Quest, it's amazing.


The remaining Mogalls dogpile Myrrh and die.


Catching me off guard, it turns out the other Maelduin also has a Bow, and runs up to Gilliam and doubles him for solid damage, ouch. Fortunately, there was no crit chance and all, so while I screwed up his raw durability meant he wasn't in real danger.
Seriously, I just kept screwing up on this mission.


Lastly, the Elder Bael/Gwyllgi reinforcements renew.
That's an intimidating number of spider monsters in one place.


I start with Franz giving Audhulma a whirl, and... forget to actually get the screenshot of its ranged attack. Whoops.
It's the A-rank Anima Tome, Fimbulvetr, animation-wise.


Neimi hops forward to act as a hilarious meatshield that can retaliate against everything, and gets a sufficiently iffy level with sufficiently high overall stats I decide to check how her caps are doing -turns out she's capped on Strength and Speed, so actually this level is decent. She only missed two stats, and Skill isn't that important at this point so whatever.

Amelia softens up the melee Maelduin, and...


... it works out to letting Ewan get another kill, which nets him a really good level!
He's not coming into the final level at the rate things're going, but he might not be perma-benched in the postgame.


Ephraim vaporizes the just-arrived Gwyllgi and gets a sufficiently awful level with sufficiently high overall stats I decide to recheck his caps -turns out that was a perfect level, as Resistance is his only not-already-capped stat.
Also, I show off what regular Gwyllgi look like for audience members who haven't played Sacred Stones or just don't remember and, like me, are overly used to Marisa's graphic.


A streak of brutal vaporizations occurs, leaving the field considerably less cluttered afterward...


... and I end turn with my formation looking like this by virtue of Tethys Latona-ing everyone to perfect health.


The first assailant is an Elder Bael going for Neimi with no chance of hurting her.
Neimi is awesome.


L'Arachel draws two Elder Baels of her own, neither of which hits, and gets a good-considering-her-caps level out of the process.


Neimi gets targeted by a Wight that couldn't possibly hit her -this keeps happening, and that's even though Monster Quest has buffed monster enemies. This mission is normally even more of a cakewalk.
She leaves it with one hit point, which is convenient!


A different Wight goes for Lute, dying horribly to no effect.


A third Wight goes for Franz and dies for its trouble.


A Gwyllgi actually hits Neimi!... for three whole damage, boo hoo.


A Mogall suicides on Lute, and even with the triangle advantage it can't hurt her.


Finally, and unexpectedly, the Cyclops come stampeding up at L'Arachel and fails to hit her, showing I could have lost L'Arachel this turn with bad luck. Oops. I'd forgotten to double-check if the Cyclops was ranged or not...


One last Wight goes for Neimi, with no chance of hurting her. She shoves its Spear into the Convoy.


The northern remaining Arch Mogall fails to Shadowshot Vanessa.


The southern one goes for Neimi, and it occurs to me to take a clear shot of a regular Arch Mogall, just in case I haven't shown it off already. (I have, but I didn't remember at the time and this still is a better shot than prior)
And no, it didn't hit her.

Lastly, three more Mogalls pop out of the temple.


Naturally, I open by sending Myrrh back to get more experience out of the jerks.


Having studied the terrain a bit, I've noticed that L'Arachel can easily get to the two Arch Mogalls' area and start incinerating them without any danger of any other enemies getting to her -so I Warp her over there to do just that, not wanting to deal with Shadowshot shenanigans complicating this situation any further when more reinforcements inevitably show up.


L'Arachel instantly gets a gratuitous crit-kill on the first one.


Meanwhile, Franz finishes off the Gwyllgi that attacked Neimi for 3 whole points of damage, to my surprise given that 61 accuracy.


Ewan... fails to disappoint again!
This time, I remembered *Thunder, but the Wight's Resistance is high enough it wasn't an option.
Oh, and the Steel Blade gets tossed into the pile. I've always been a bit confused as to why this mission throws so much junk at you, honestly.


Rescue shenanigans of the regular sort proceed to occur -wow, it's been a while since I used those- to get Ewan out of the line of fire.


Knoll gets a pretty nice, if defensively slanted, level out of finishing off the more northerly Elder Bael.

Neimi softens up the southern one while blocking off the route to reaching Knoll -he's still too vulnerable.


Amelia softens up the Cyclops, in no real danger herself, and gets a nice level out of it.
I spend a bit wishing it was realistic to have Ewan or Gilliam take advantage of the Cyclops' 8 hit points, and then move on.


Instead, Lute wipes it out so nobody has to take risks, netting me more free money.

And then I end turn after some more moving up.


The closer Elder Bael wastes its time trying to target Tethys. I'm assuming this is the AI's obsession with avoiding retaliations at work.


The other Elder Bael goes for the only available target, Neimi, and it's just as futile with a side order of getting it mauled.
That's an interesting-looking motion blur there.


Mogalls dogpiling Myrrh, yawn.


The Arch Mogall fails to hit Eirika, unsurprisingly.


And, lastly, even more reinforcements arrive.
Before anything else...

... L'Arachel takes the last Shadowshot Arch Mogall out. Huzzah!

Myrrh continues to work on the Mogalls in complete safety.


Ephraim softens up the northern Gwyllgi up from a distance, which...


... leads to another Ewan level, surprisingly! A perfect one, at that!


Ross fails to actually kill his Gwyllgi, unusually.


Eirika softens up an Elder Bael for her final dead level -and while I didn't screenshot it, I did double-check that she's no longer allowed to gain experience.
Behold! Her final form!
I've really enjoyed Eirika in Monster Quest. She's really good, but unlike Ike in Radiant Dawn she doesn't start the game basically able to solo maps. Even now, if I were careless with her she could die, it's just not guaranteed she would. It's a really good balance, and a much better approach to the Lord than making them a mandatory weak point in a series where you don't want any deaths anyway.
(Unless you're trying to see hidden content in Shadow Dragon or the like, but that's a whole other thing)


Anyway, back to the mission, we've got Knoll finishing off a different Elder Bael. I was expecting him to miss, to be honest.


Franz continues to leverage Audhulma, this time to finish off an Elder Bael for a nearly perfect level. Awesome.
Franz is running behind my best characters, but he's really good, and he's still got room to potentially max out... literally every stat, I think. He probably won't, but he could.


Amelia fearlessly melees the Gwyllgi Ross failed to kill -she can only take 6 damage at most, after all.

Neimi softens up one of the reinforcement Elder Baels...


... and Artur fails to properly follow through, setting up what is tempting to try to have Ewan attack, but not very realistic.


I end up having Tethys give Knoll a second shot, which he succeeds at this time.

And then I end turn looking like this, not wanting to get anyone dogpiled and killed.


Eirika is approached by an Elder Bael, but it literally can't touch her.


Franz is slightly more vulnerable, but dodges regardless... and improbably misses on a 92%-before-True-Hit retaliation.


Neimi, like Eirika, can't be touched, and flat-out vaporizes the Elder Bael, allowing...


... a Wight who also can't touch her to come along for a suicide...


... followed by another Wight still unable to touch her.
She gets a pretty nice level given her stat caps.


Lastly of this bunch, the Gwyllgi flails ineffectually at her, and survives because it's too fast to be doubled.


Meanwhile, the last Mogall suicides on Myrrh and she's so close to another level.


Which makes it my turn, and I open with having Knoll level up by softening up an Elder Bael. Not an ideal level, but Magic and Speed are the most important stats overall...

Through the magic of failure, we miss Ross' pre-targeting report and all, but he killed the southern Gwyllgi.

See? You can see the northern one is still about and that Ross isn't even positioned to hit the north one.
Also, Amelia finishes off a badly weakened Elder Bael.


Franz takes out another one and I still haven't taken a screenshot of Audhulma's ranged attack.


Ewan tries to use *Lightning to get experience off the Gwyllgi, and misses twice. Ugh.


So I go with having Gilliam take an opportunity -sure, it'll double him with high odds of critting him on each hit, but his Defense is so high it can't actually kill him. And amazingly it even misses, while he got his one hit in!


Then Artur finishes it off.


With barely anything left to do, I move people up and have Tethys fix up Artur's Flux again.


That last poor Wight up here tries to suicide on Ross, but he manages to miss at 88%-before-True-Hit. That's... actually pretty convenient!
Also notice how L'Arachel is heading south, to the cluster of enemies down there, while Neimi is heading toward the area behind the temple.


My turn, and it's another Gwyllgi+Elder Bael reinforcements blob. Here I'd thought we were done with that.


L'Arachel gets started on why she's here, nuking this Axereaver Wight from a spot only the ranged attackers can reach her at. She actually needed that crit, too.
The Axereaver is actually appreciated with how many dedicated Lancers I've got running around in my A-team.


Myyrh softens up the northern Gwyllgi purely so she can get her next level, and I'm particularly glad to see the +2 HP, even if it'd be nice to get more Luck.


Lute goes to soften up the middle Gwyllgi, and to my surprise actually lands both hits.


Franz continues to use Audhulma at range and I continue to fail to screenshot it properly.


This leads to a frenzy of Elder Bael-slaughter.


Artur tries to finish off the middle Gwyllgi and fails, but whatever.


I end up sending in Colm, not comfortable with trying to send in Ewan when it's looking like I'm not liable to kill everything in the area. Colm contributed to the mission for once!


Ross promptly crit-kills an Elder Bael, making my concerns a bit moot.


And Tana follows in his footsteps with the other.


Marisa works on the northern Gwyllgi, but surprisingly leaves it at 2 HP. Perfect!


Ewan ruins this perfect setup by missing twice with *Thunder.
Aaaargh.


It's a bit of a risk, but I decide to have Tethys give him a second chance. This time, he kills it on the first shot... doesn't manage to level, though.


I consider trying to have Gilliam finish off the Wight, but decide it's too risky and so have Vanessa finish it off at range, netting me a Killing Edge. Whatever.


Neimi starts soften- excuse me, she gets a 3% crit on her first strike and so re-kills Morva in one round, netting her another level that isn't as bad as it looks given her caps.
'k.

I end turn with this last bit of movement...


... and on the enemy turn L'Arachel dodges both 3-range attacks made at her.


My turn, and there's that one reinforcement Gwyllgi to deal with. More experience for Myrrh! And it would be for Ewan too if he'd stop missing.


Artur snags the kill with a timely crit, which is kind of annoying because I was seeing an opportunity to feed a kill to Gilliam, but at least Artur got an... okay-ish level out of it.


L'Arachel gets started on killing the Gorgon.

And I end turn with Tethys healing everyone again, with a new and way more boring screenshot.


L'Arachel slaughters this Wight...

... but not this one...


... and not the Gorgon, since they both insist on firing from range 3.


And then even reinforcements show up.
Whatever. I decide at this point I don't care that much about the experience. I'll kill stuff, and then bail.


So blah blah L'Arachel fails to kill the southern Gwyllgi.


Ross crit-kills another Elder Bael.


Myrrh fails to hit anything. Whatever.


Artur vaporizes the Gorgon.


Lute actually gains a level out of finishing off the Longbow Wight. And it's a pretty darn good one!

Amelia finishes off the southern Gwyllgi.
... in retrospect it might've made more sense to use Tethys to feed the kill to Ewan?


Marisa utterly murders an Elder Bael without getting touched and gets a fantastic level out of it.


Franz surprises me with a crit-kill -I've mentioned that Great Lord Eirika's magic sword attack animation is a really brief flickering effect on the sword, and apparently for Bonewalkers/Wights it's the same thing but even faster.


Tana softens up the middle Gwyllgi.


Knoll fails to soften it further, which is annoying because I wanted Ewan to get this kill.


Vanessa also fails to hit it...


... so I give up and let Ephraim take the kill even though he's capped on everything. Sorta pointless in retrospect.


Neimi softens up the remaining Elder Bael...


... and with Tethys' assistance and a bit of luck, Ewan manages to finish off the Elder Bael anyway, netting him another fantastic level!

Against my better judgment, I decide to wait one more turn so I can take out this final Gwyllgi.


It fails to accomplish anything against Marisa, which means...


... Myrrh is able to snag the kill, to my surprise.

And that's it! Eirika walks us into the temple and this way-too-long mission is finally over!
Knock-knock. Oh, I see you've brought the final Sacred Stone for me to smash.Wait, what?... was I not supposed to grab it?Of course not! We may not know what Lyon is trying to do or why, but we've decided he's an enemy and we know it's something he wants! It was to remain under lock and key in the capitol!Oh. The Pontifex told me I should take it with me and give it to someone important and special.
 He meant me.... why would my dearest uncle want our sacred relic-slash-engagement-ring given to you?Well, I am Prince Lyon of Grado, and you and/or Innes there are both important royal children yourselves. I let the man fill in his own reasons.I am offended.I don't care, as it happe-You're not even good enough for me!...... are you attempting to imply I-What? No, of course not, don't speak rubbish. The Gradosians don't even operate on a proper lineage. They 'promote on merit' or some such rot. Lyon's father is no more royal than your Carcinite thief.
 Rogue!You're a rotting corpse, shut up!... if that's how you're going to be... welcome to my parlor.I'm the one whose adoptive father is a giant spider. You're not very good at picking metaphors that speak well of yourself.Well, I am supposed to have self-esteem problems or something.I'm pretty sure you're just an idiot.
 Look, just come on in and die already so I can smash the Sacred Stone.... so what was that about being invited by Fomortiis himself?I'm not going to dignify that with an answer.
-------------------------------------
See you next mission... the final one, as it happens. Sorta.


Comments
Post a Comment